Last updated on January 8th, 2024 at 01:54 pm
Possibly, your vehicle tires have reached their end life, or you want to swap them out for a seasonal change.
Either way, one thing preventing you from getting started is tire bead. Right? I can hear that resounding YES!
Well, these beads are stubborn. And it’s a good feature in terms of performance and safety. But when it’s time for a change or maintenance, you’ve got to know how to break the bead on a tire.
In this comprehensive guide, I’ll show you the step-by-step process of freeing the tire from the rim and some essential tips to make bead removal a breeze.
Table of Contents
What is a tire bead?
The tire’s inner edge that comes in direct contact with the wheel’s outer surface, i.e., the rim, is known as the tire bead. The beads are designed to securely attach the tire to the rim, playing a crucial role in tire and wheel assembly.
When the tire is inflated, the bead pushes against the sidewall to create a seal which ensures proper air pressure. But what’s inside the bead, you may be wondering now.
A bead is a thick cluster of steel wires or cables plated with brass, copper, or other materials. This coating enhances wires’ durability and strength.
Manufacturers leave a minor groove or slot for beads to sit in during tire production. You can’t see the bead on a properly mounted and inflated tire, as it’s on the inner side of the tire in this groove. If you can see, however, it’s an alarming sign that something may be wrong with the tire’s seating or inflation.
Different types of beads found on tires
There are mainly two types of tire beads. One is a traditional steel wire bead, and the other is a folding tire bead. Each has its advantages and limitations.
Rigid/Wire tire bead
Wire beads are made of steel cables and dual (tough & soft) rubber compounds, making the tire’s central portion stiff. However, the sidewalls are soft for easy adaptability to terrain. The stiffness of steel makes these tires non-foldable & non-portable.
It’s primarily a concern when shipping tires or when you need to transport your vehicle in parts. They also make tires heavy. However, wire-beaded tires are durable & long-lasting and, thus, used in many vehicles and equipment.
For example, ATV and lawn-mower tire beads are of wire type mostly. Other wire or rigid tire bead examples include passenger cars, trucks, jeeps, bicycles, scooters, and off-road bikes like MTB.
Folding tire bead
Have you ever encountered a neatly-packed foldable tire in an automobile shop or online store? These tires are incorporated with folding beads made of a flexible ” Kevlar ” material. Folding or aramid beads are lightweight in nature. Hence, they are used in racing bikes and car tires where riders need to accelerate quickly.
Moreover, their foldable nature makes shipping and transporting easy and affordable. Electric or racing motorcycle tire beads also fall in this category. The lightweight nature of tires reduces the overall rotational weight, enhancing speed and control.
However, Kevlar tire beads wear quickly. Hence, they are not long-lasting and need replacement very often. Moreover, they are expensive and thus used only in high-end vehicles.
Fool-proof methods to break the bead on a tire
Now that you understand tire beads well let’s discuss how to break them to change, inspect, or repair tires. There are various methods you can use for this purpose. However, the things that make them easy or challenging are tools and your strengths.
Professional mechanics use giant machines called “tire changers.” It has a semi-automated bead loosening mechanism that separates the tire from the rim. Obviously, you can’t afford such commercial-level machines for personal use.
But there are some portable and affordable tools called bead breakers, which you can use to separate the tire from the rim during maintenance. The standard bead breakers include shoe-and-lever, plier-type, and clamp-and-ram-type. The following sections show how to use these tools to break the bead on a tire.
Shoe-and-lever-type bead breaker
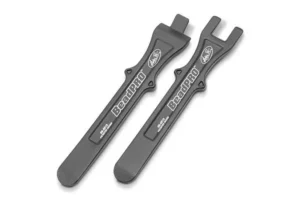
The tools consist of two 9 to 10-inch long and narrow steel/metal plates. One has a unique tongue-and-groove design to fit into the wheel’s sidewalls. The other is a curved spoon to pry the tire off the rim.
Here’s how you can use this tool to break a tire bead.
- Deflate the tire and place it on a leveled surface or wooden block
- Position one of the two levers having a groove design on the tire bead facing the rim.
- Push it down to the bead until it is seated.
- Now position the second lever having a curved-spoon design on the first lever.
- Pry down on the tire lever until the tire separates from the rim.
- Repeat these steps on the tire’s circumference to break the bead all the way around.
Here is the visual guide for better understanding.
Plier-type bead breaker
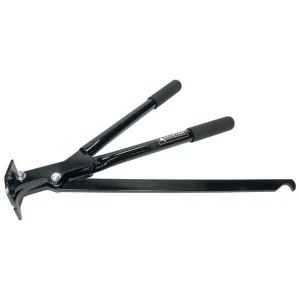
This bead breaker consists of a hardened-steel jaw with adjusting screws to grip the bead, two handles with comfortable grips, and a non-pivot steel rod with a groove to grip the rim on the opposite side. Follow these steps to break the bead of the tire.
- Adjust the pliers by moving screws to fit the rims.
- Deflate the tire and place it on a leveled surface.
- Stand on the wheel in a balanced position.
- Place the jaws of pliers on the tire bead from one end and the non-pivot metal rod on the opposite side under the lip of the rim.
- Press both ends of the pliers with your feet to grip the bead and rim, respectively.
- Now, move one handle of the tool in the outward direction with your hand so that it can compress the tire.
- Keep exerting force until the bead separates from the rim.
- Repeat this process on the other sides of the tire to break the bead thoroughly.
Watch this video for a better understanding of this process.
Clamp-and-ram-type bead breaker
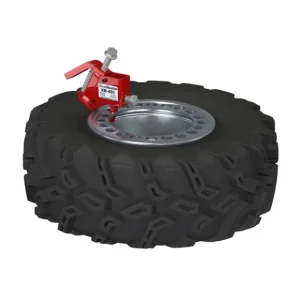
These bead breakers are very effective for old or bulky tires. It’s also recommended for ATV tires that need specialized tools to separate them from the rim. The tool involves a clamp to secure the bead breaker to the rim and a ram that forces the bead off the rim.
The ram has a pointed foot that inserts between the bead and rim. Both these parts are equipped with big bolts and screws for adjustment.
The following steps show how you can break the bead of a tire using this tool.
- Release air pressure from the tires and place it on an even surface.
- Apply the soapy water to the bead evenly so the tool can smoothly reach it.
- Place the pointed ram feet between the tire and rim by holding the tool from the handle.
- The initial force helps create a small gap for the fee to get in deep.
- Tighten the clamp bolt using a ¾” impact wrench, drill, ratchet, or hand wrench until the tool body touches the rim.
- Don’t over-tighten the bolt, as it will damage the bead, rim, and tire.
- Make sure the foot is inserted correctly into the rim.
- Use the same wrench to tighten the ram bolt until the tire bead gets off the bead retainer on the rim.
- Loosen the ram and clamp bolts.
- Repeat the process on several points of tires to get it off the rim.
Take a look at this video for proper guidelines.
How to break a tire bead at home?
You can also break the bead of a tire using tools you might have around the house. Let’s discuss some of these.
Break the tire bead with a pry bar
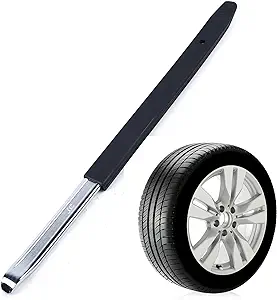
The pry bar is a versatile hand tool commonly found in many toolboxes. It’s also more affordable to buy than the specialized bead breakers. To break tire beads using pry bars, follow these steps.
- Deflate the tire using a valve core removal.
- Place it on an even surface or a wooden block.
- Apply some lubricant around the bead of the tire to reduce friction.
- Insert the pry bar between the bead and rim.
- Exert force gradually so the pry bar can make a gap between the tire and rim. You can also tap the pry bar with a hammer.
- Keep doing this until the bead gets off the rim.
- Rotate the tire and repeat the same steps on other points.
Break the tire bead with a C-clamp
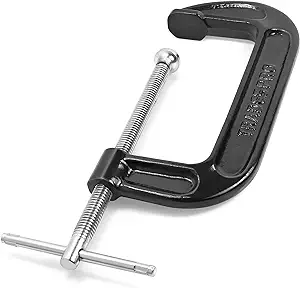
C-clamps aren’t only for carpentry or metalworking. You can also repurpose them to remove tire beads by following this method.
- After deflating the tire, place it on a 2- or 3-inch thick, broad piece of wood.
- Place the whole setup on a sturdy stool so it’s above the ground.
- Now, take two C-clamps.
- Position them on the two opposite ends of a tire so the tire and wooden block come between their jaws.
- Start tightening the c-clamps until the wood presses firmly against the tire from beneath.
- It lets the upper jaws of c-clamps grip the tire bead and push it off the rim.
- Use a lever to pry the tire over the rim.
- Repeat the process with other points on the tire to separate it from the wheel.
You can use any of these methods to break the tire bead. Some of the tools are affordable but need more physical strength. Specialized bead breakers, though expensive, are easy to use.
What to do after breaking the tire bead?
After separating the tire from the rim, you must follow some crucial steps to ensure proper tire seating and mounting.
- Inspect the tire & rim.
First, inspect the tire for punctures, cuts, bulges, etc. And do maintenance, including replacement if necessary. Also, examine the rim for dents, bends, or rust to ensure proper tire mounting.
- Reseat the bead
Now it’s time to reseat a bead. This step demands careful consideration. It includes cleaning the tire’s inner edges and the rim so the bead can seat properly.
Next, lubricate the tire to help the bead slide smoothly onto the rim. You can use lubricants and grease explicitly designed for this purpose. Alternatively, you can use soapy water or silicone spray.
Let the bead seat on the tire by leaving the tire in an open atmosphere. You can also use an air compressor for this purpose.
- Tire Inflation
Inflate the tire according to the manufacturer’s recommendations to precisely help the bead seat on the rim. The accurate air pressure will create a seal between the tire and the rim. After this, take a final inspection of the tire by pouring the soapy water on the bead. Look if it shows air bubbles. If it doesn’t, all is good.
- Remounting
Put the wheel back into the vehicle using tire mounting tools. Start by screwing the lug nuts in a star pattern and follow the recommended torque values to ensure proper alignment.
FAQs
How to break a tire bead using bottle-jack?
- Lay the flat tire on a leveled surface under a wooden or metal stool with a space between them.
- Position the base of the bottle jack on the tire bead close to the rim.
- Slowly raise the cylinder by applying pressure through the handles or adjusting the screw with the help of a drill.
- Keep doing it until the lifting cylinder touches the stool and press firmly against it.
- The bottle jack forces the tire down, prying it off the rim.
- Repeat the process on other points to break the tire bead thoroughly.
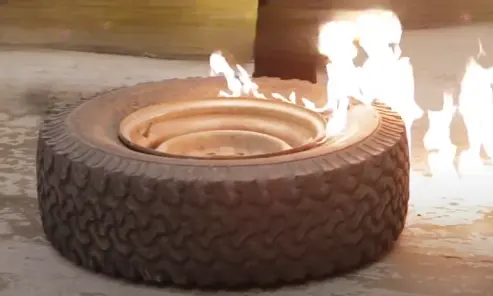
How to seat a tire bead with WD-40?
You may need to take precautions while using a WD-40 for tire bead seating. It may include avoiding working near potential ignition sources, wearing gloves, applying a thin coating to the bead, and wiping off excess lube. However, most auto repairers don’t recommend using WD-40 for tire bead seating as it’s a flammable material, putting safety at risk. Moreover, it doesn’t provide the same level of adhesion as dedicated bead lubes.
Sum up
It concludes our comprehensive discussion on tire beads. Hopefully, this guide has resolved all your concerns and helped you understand how to break the bead on a tire. If you’re not tech-savvy, breaking a tire bead at home is easy using tools like pry bars, tire irons, etc. Whatever your preferences will be, make sure you align them properly; it’s essential to prioritize safety.

Hadie,
What sets the footprint of a tire, tire pressure measured using absolute (PSIA) or gauge (PSIG) pressure?
Hello Harry, thanks for reaching out.
When setting or analyzing the footprint of a tire, you can not depend on absolute PSI, as it includes the atmospheric temperature in its reading, that is why it is called absolute pressure. On the other hand, GaugePSI considers atmospheric temperature to be 0 and executes its finding. So, in tire air pressure applications, most of the time, when you hear about air pressure, it will refer to the gauge air pressure. Absolute air pressure is mainly use in research and engineering fields.